


Whether we’re talking about decking balustrades or our high performance composite, convenience is the cornerstone of every Trex product. Explore the six simple steps below to understand the basics.
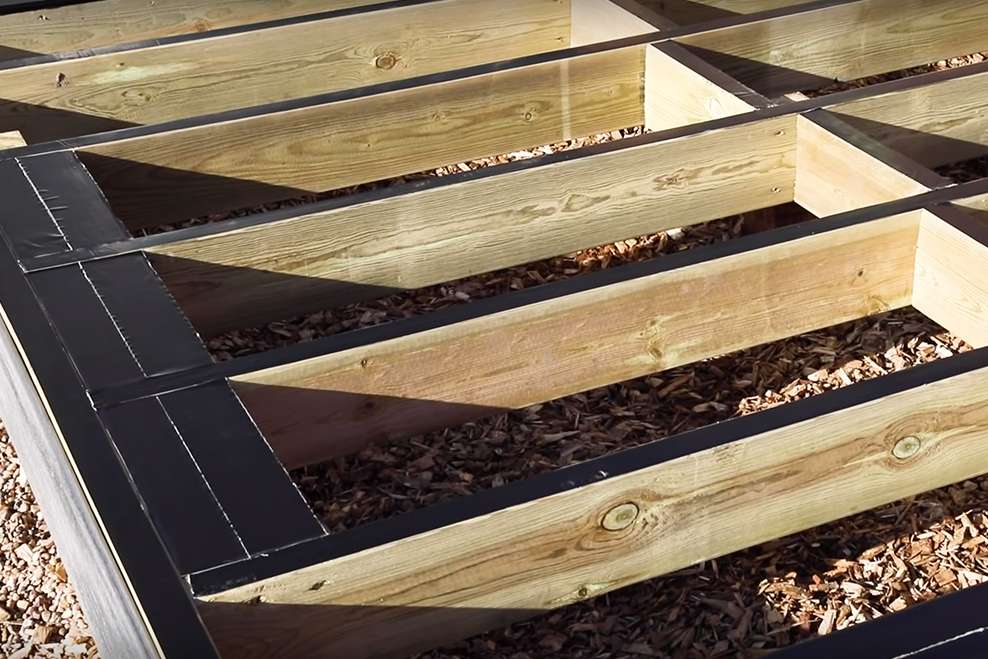
1. Protect your substructure
Trex can be installed over timber, steel or aluminum substructures with joist centers at a maximum of 400mm apart. If building over a timber substructure, you should consider using Trex®Protect™ self-adhesive butyl tape to prevent moisture damage.

2. Cut your boards
For a neat finish, we recommend trimming boards on both ends at a minimum of 5mm. They’re always supplied with extra length, so you can clean cut both ends and still have the size you need.

3. Choose your layout
Every Trex board is unique. To ensure the best variety of colour tones, mix and match all boards in the most visually appealing way prior to installation.
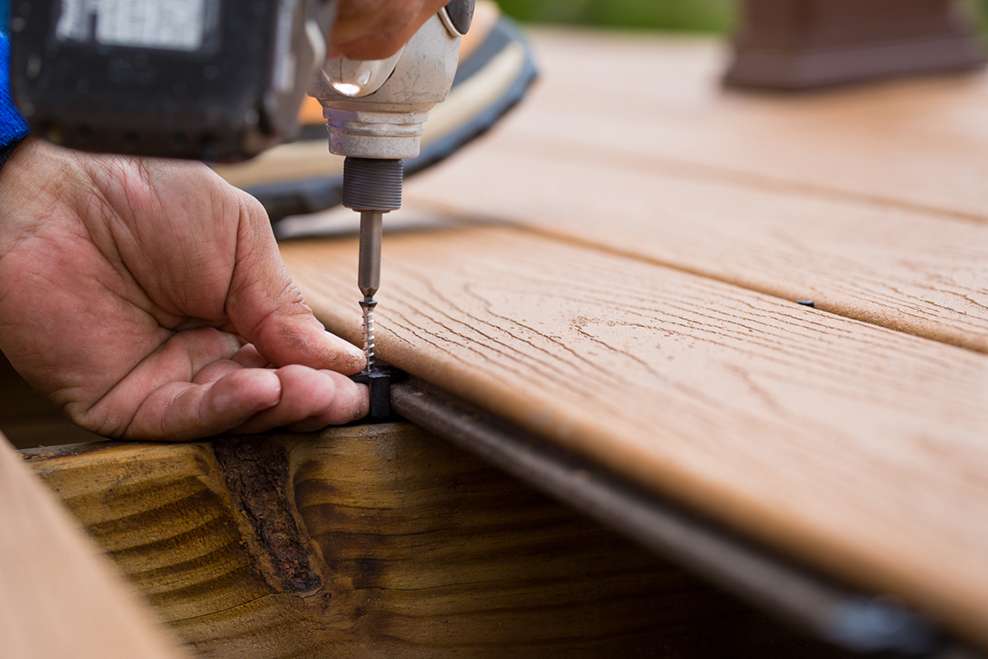
4. Hide your screws
For a screw-free finish, Trex Hideaway® Secret Fixing System can be used to install grooved-edge boards. The Universal Fasteners connect two boards together if you drill downwards, directly into the joists. They should be no more than 25mm from the end of the board.
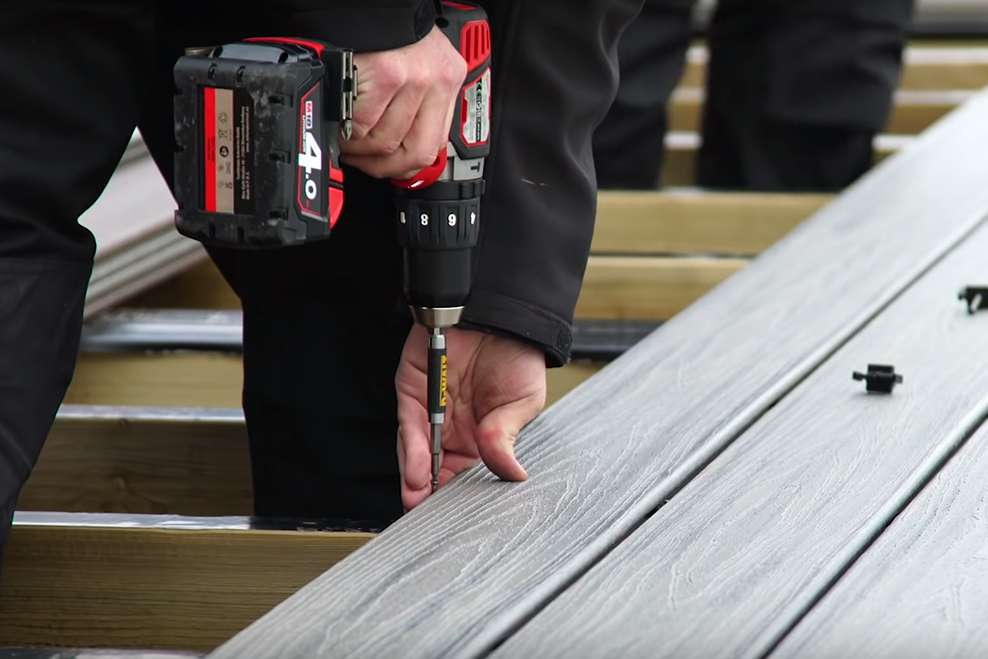
5. Tighten as you go
We suggest partially installing the fasteners along a row, allowing you to easily fix the adjoining board when you get to the next. You can then revisit a row to tighten things up when several rows are installed.

6. Cover the decking edges
Install Trex® Fascia boards to the edges of your patio to give it a more polished look. This finishing touch is now available to match every Trex decking option—so whatever you choose, we’ve got you covered. Just like that, you’re installed—with decking handrails and balustrade next on the list.